---
title: HDPでHueを手動設定する
author: Hue Team
type: post
date: 2019-03-08T08:45:48+00:00
url: /configure-ambari-hdp-with-hue/
sf_thumbnail_type:
- none
sf_thumbnail_link_type:
- link_to_post
sf_detail_type:
- none
sf_page_title:
- 1
sf_page_title_style:
- standard
sf_no_breadcrumbs:
- 1
sf_page_title_bg:
- none
sf_page_title_text_style:
- light
sf_background_image_size:
- cover
sf_author_info:
- 1
sf_social_sharing:
- 1
sf_related_articles:
- 1
sf_sidebar_config:
- left-sidebar
sf_left_sidebar:
- Sidebar-2
sf_right_sidebar:
- Sidebar-1
sf_caption_position:
- caption-right
sf_remove_promo_bar:
- 1
categories:
- Uncategorized
---
ビッグデータユーザーの皆さん、こんにちは
Ambariで管理している HDP クラスターをお持ちの場合、これは最新の Hue をテストする方法のガイドになります。このガイドは SQL エディタと HDFS ブラウザのみに焦点を当てており、非セキュアな企業向けではないセットアップを想定しています。
**ステップ 1:**
Ambari サーバー以外のいずれかのホストで、以下のコマンドを実行して最新の Hue とその依存関係を [コンパイル][1] します。
yum install -y git
git clone https://github.com/cloudera/hue.git
sudo yum install -y ant asciidoc cyrus-sasl-devel cyrus-sasl-gssapi cyrus-sasl-plain gcc gcc-c++ krb5-devel libffi-devel libxml2-devel libxslt-devel make  mysql mysql-devel openldap-devel python-devel sqlite-devel gmp-devel libtidy maven
ビルド:
cd hue
sudo make apps
**ステップ 2:**
Ambariの設定を更新します。
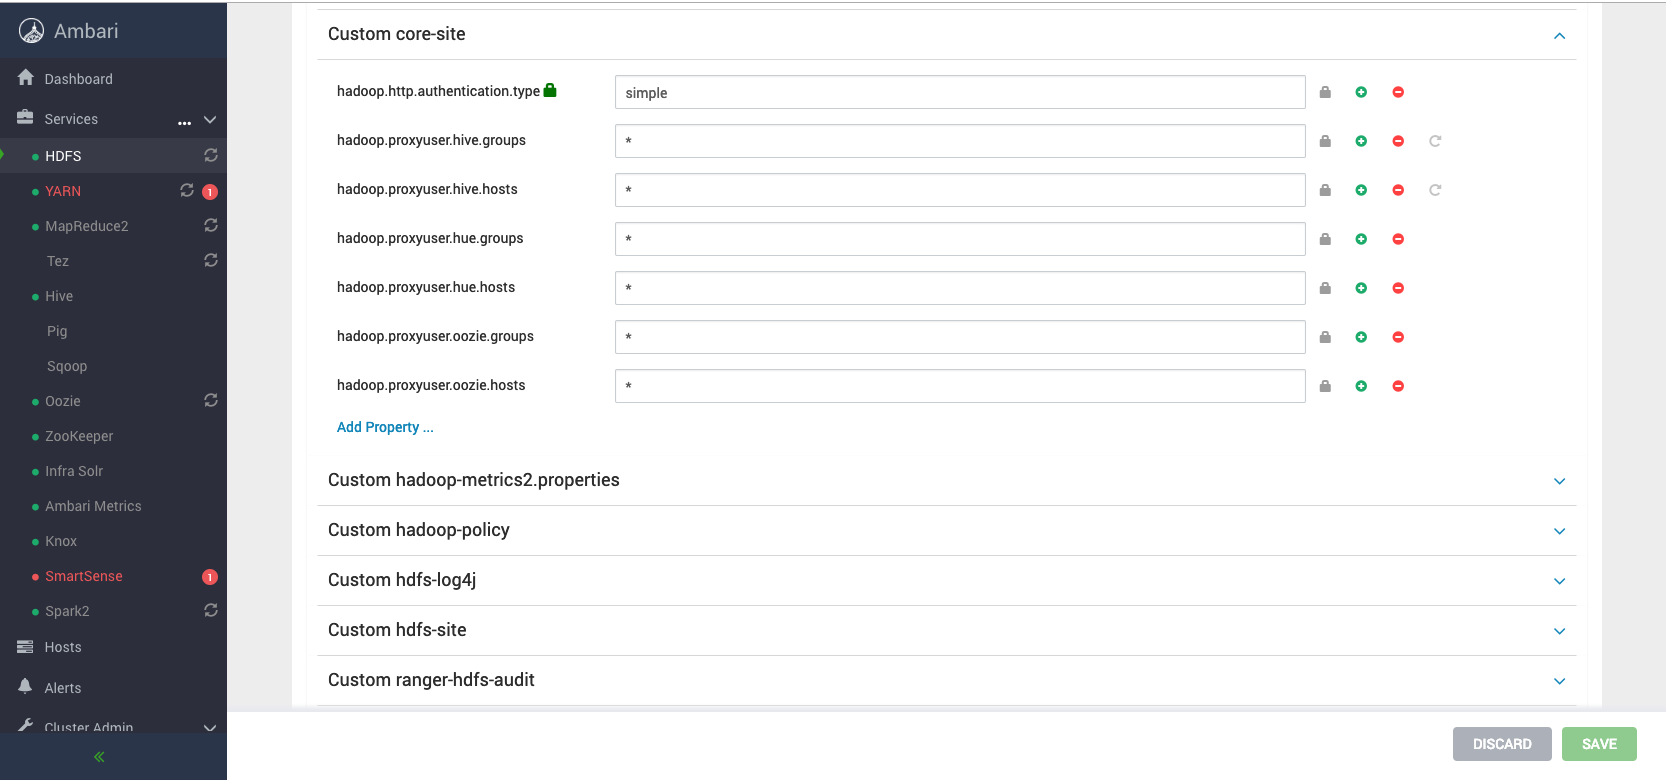
1. `HDFS --> Configs --> Advanced` にスクロールダウンし、”Custom core-site” を展開して “Add Property… ” をクリックして、”hadoop.proxyuser.hue.hosts:\*” と “hadoop.proxyuser.hue.groups:\*” を追加します。続いて “Save” をクリックします。[ ][2]
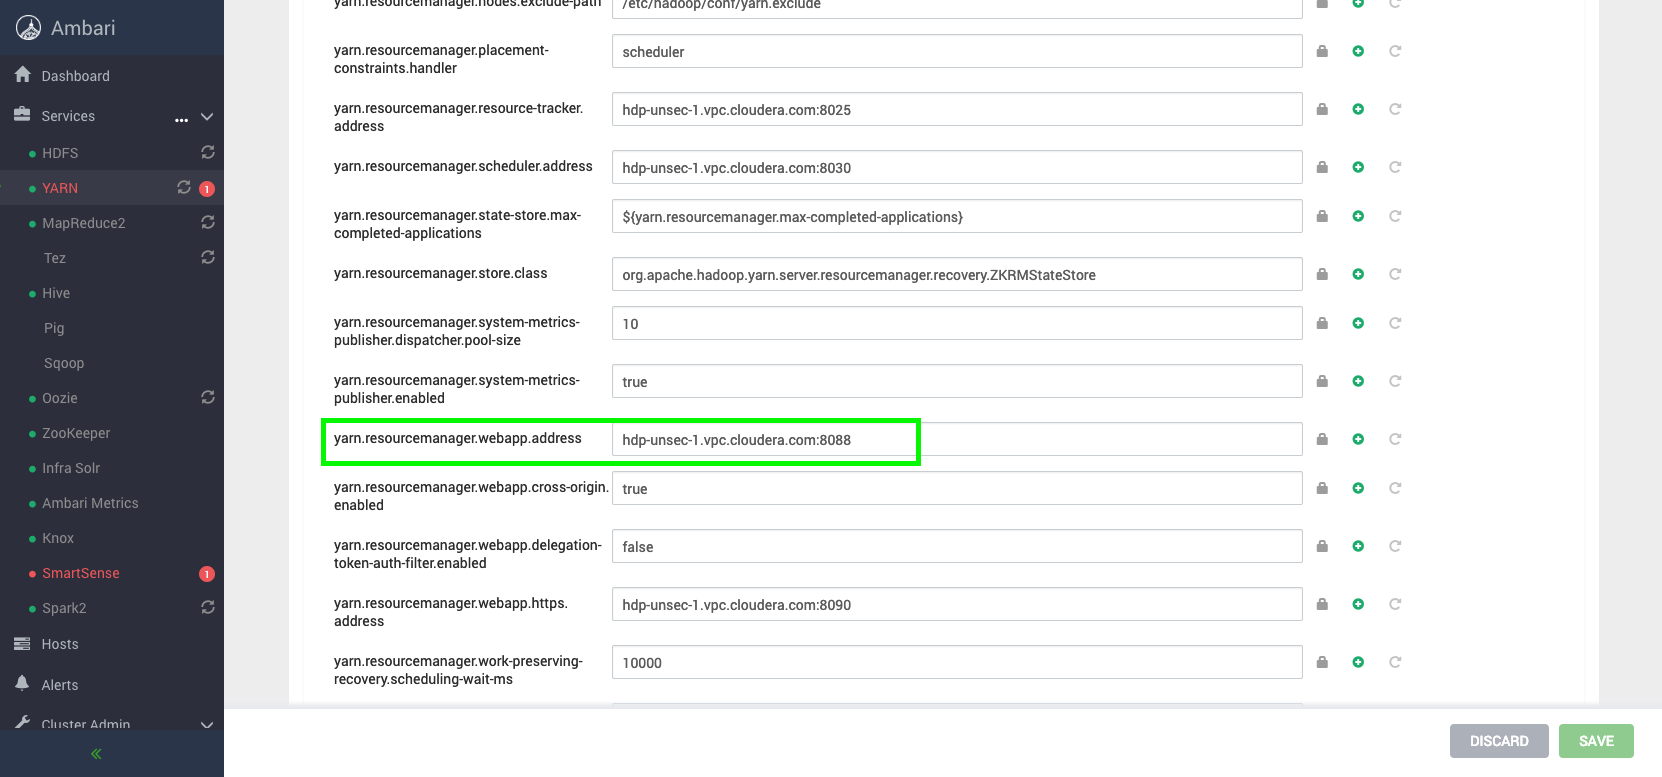
2. Ambari の UI で `YARN --> Config --> Advanced --> Advanced` に進み、yarn-site.xml の yarn.resourcemanager.webapp.address を確認して hue.ini に追加します。
[
 ][3]
3. MySQL サーバーホスト、通常host-1で Hue のデータベースを作成します。
ssh root@hue-1.example.com
mysql
create user 'hueuser'@'localhost' identified by 'huepassword';
create database huedb default character set utf8 default collate utf8_general_ci;
grant all on huedb.* to 'hueuser'@'%' identified by 'huepassword';
exit;
4. hue ホストで、以下の値で hue.ini を更新します。
ssh root@hue-2.example.com
 vim ~/hue/desktop/conf/pseudo-distributed.ini
hue.ini
[beeswax]
max_number_of_sessions=2
[hadoop]
webhdfs_url=http://hue-1.example.com:50070/webhdfs/v1
resourcemanager_api_url=http://hue-1.example.com:8088
そして実行します。
cd hue build/env/bin/hue syncdb
build/env/bin/hue migrate
build/env/bin/hue runcpserver
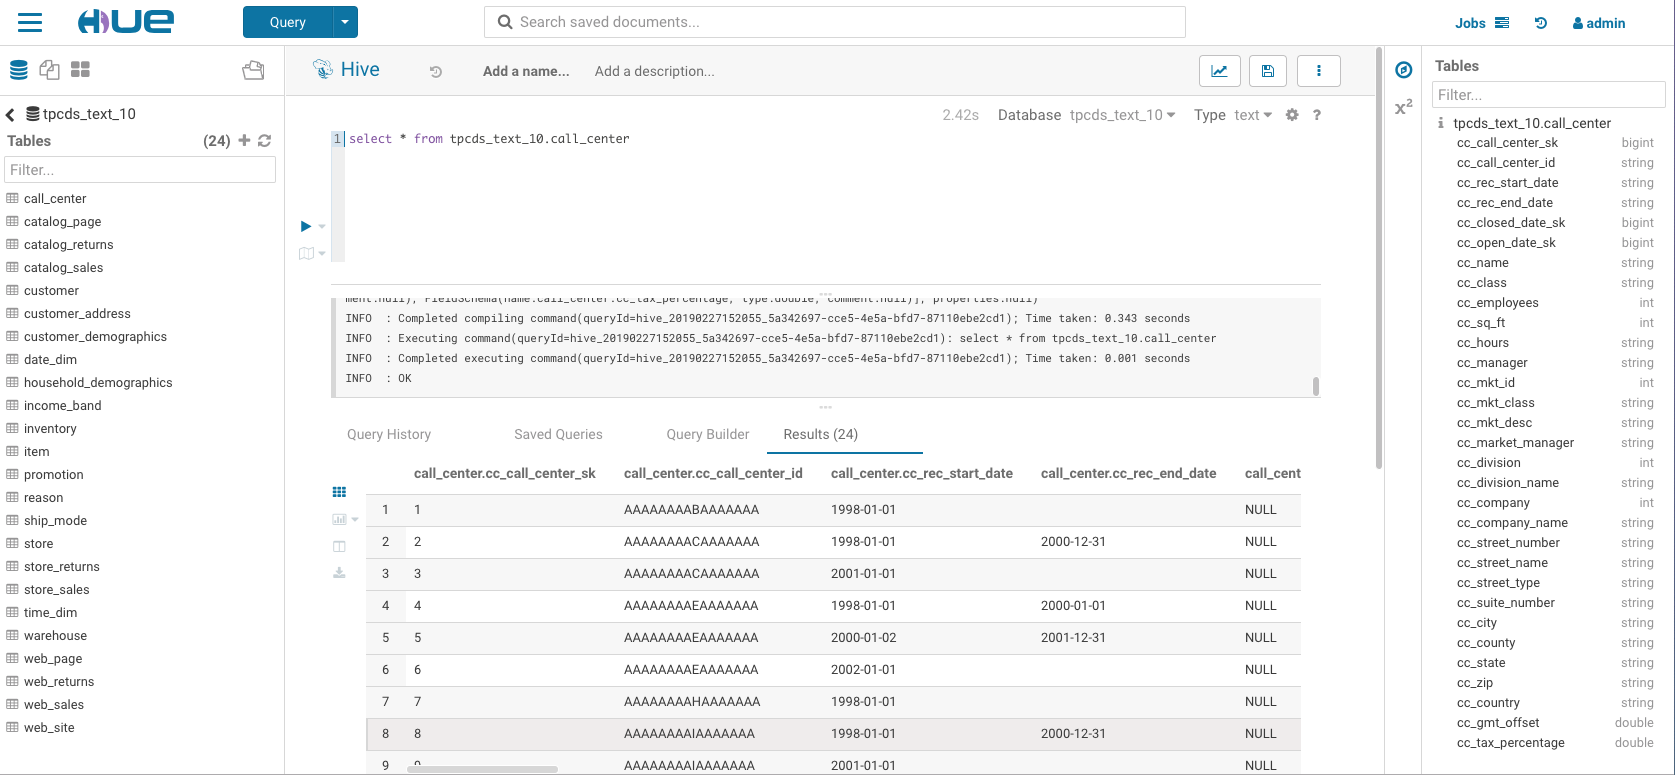
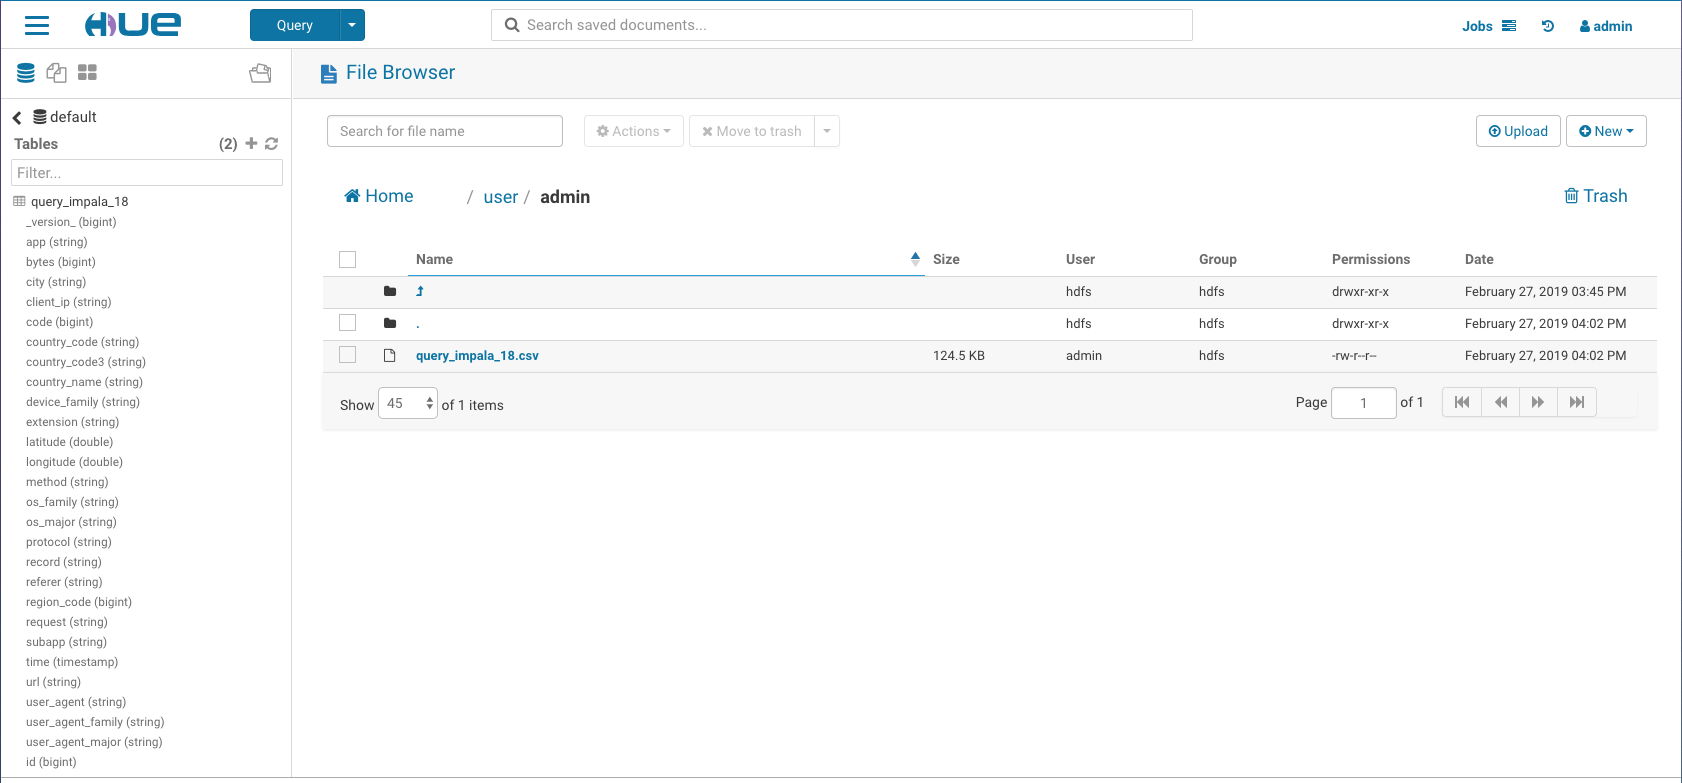
5. [hue-2.example.com:8888][4] にアクセスして、多くのコンポーネンツを追加するために[configuration page][5] を確認してください!
[ ][6]
[
 ][7]
いつものように、コメントやフィードバックは [hue-user][8] リストは [@gethue ][9]までお送りください!
[1]: http://cloudera.github.io/hue/latest/admin-manual/manual.html
[2]: https://cdn.gethue.com/uploads/2019/02/Screen-Shot-2019-02-27-at-3.05.28-PM.png
[3]: https://cdn.gethue.com/uploads/2019/02/Screen-Shot-2019-02-27-at-3.10.39-PM.png
[4]: http://hue-2.example.com:8888
[5]: https://gethue.com/how-to-configure-hue-in-your-hadoop-cluster/
[6]: https://cdn.gethue.com/uploads/2019/02/HiveEditor.png
[7]: https://cdn.gethue.com/uploads/2019/02/fileBrowser.png
[8]: http://groups.google.com/a/cloudera.org/group/hue-user
[9]: https://twitter.com/gethue
  ][2]
2. Ambari の UI で `YARN --> Config --> Advanced --> Advanced` に進み、yarn-site.xml の yarn.resourcemanager.webapp.address を確認して hue.ini に追加します。
[
 ][3]
3. MySQL サーバーホスト、通常host-1で Hue のデータベースを作成します。
 ][6]
[
 ][7]
いつものように、コメントやフィードバックは [hue-user][8] リストは [@gethue ][9]までお送りください!
[1]: http://cloudera.github.io/hue/latest/admin-manual/manual.html
[2]: https://cdn.gethue.com/uploads/2019/02/Screen-Shot-2019-02-27-at-3.05.28-PM.png
[3]: https://cdn.gethue.com/uploads/2019/02/Screen-Shot-2019-02-27-at-3.10.39-PM.png
[4]: http://hue-2.example.com:8888
[5]: https://gethue.com/how-to-configure-hue-in-your-hadoop-cluster/
[6]: https://cdn.gethue.com/uploads/2019/02/HiveEditor.png
[7]: https://cdn.gethue.com/uploads/2019/02/fileBrowser.png
[8]: http://groups.google.com/a/cloudera.org/group/hue-user
[9]: https://twitter.com/gethue